# Processing product images
Image files must be stored in Airtable at a reduced size in order for images to load efficiently in both apps.
These instructions go through how to process the images using https://www.iloveimg.com/ (opens new window) to save images at standard dimensions with a reduced file size.
# Step 1. Resize the image(s)
- Go to this site (opens new window) and upload the product image(s).
WARNING
To save time, you can upload multiple images at a time. However, you must upload all .pngs separately from .jpgs in order to complete Step 2.
- Under Resize Options, select BY PIXELS and enter 360px under width. Make sure that only Maintain aspect ratio is selected.
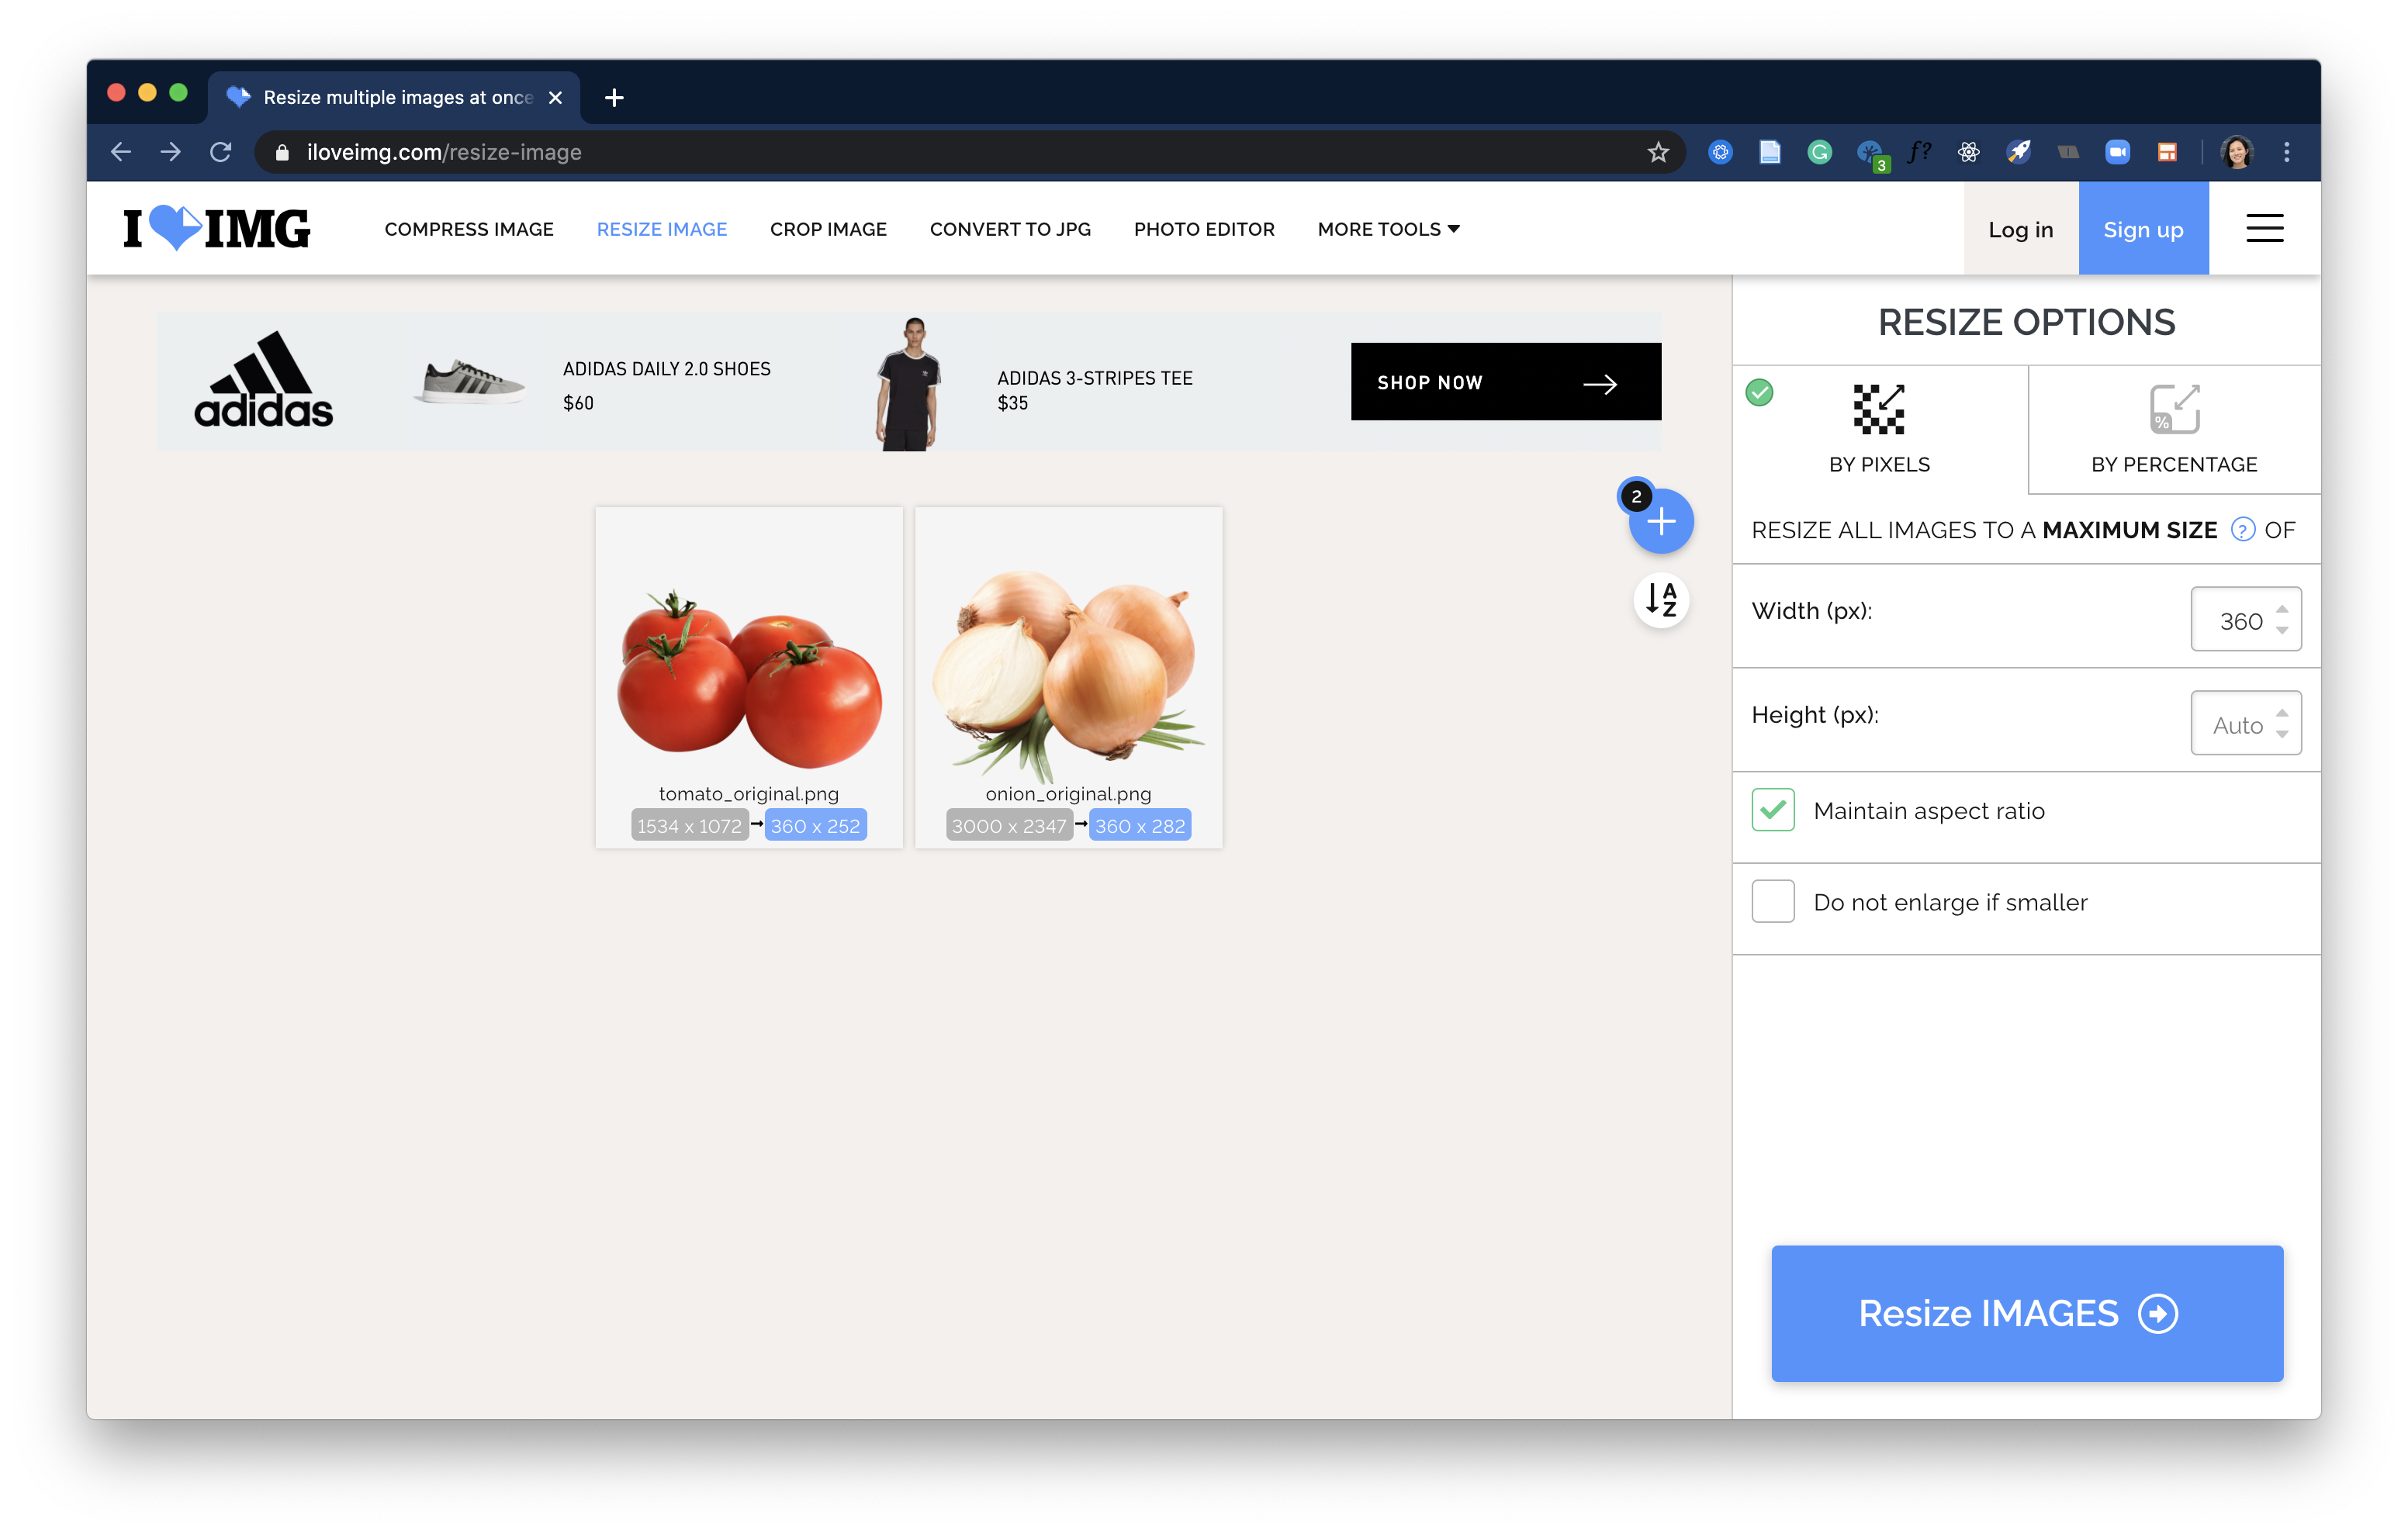
- Select Resize Images ->
WARNING
Do not click Download yet. These steps can be done consecutively without re-uploading images.
# Step 2. Convert to JPG (for .png files only)
- Select the yellow square icon in the menu to Continue to Convert to JPG
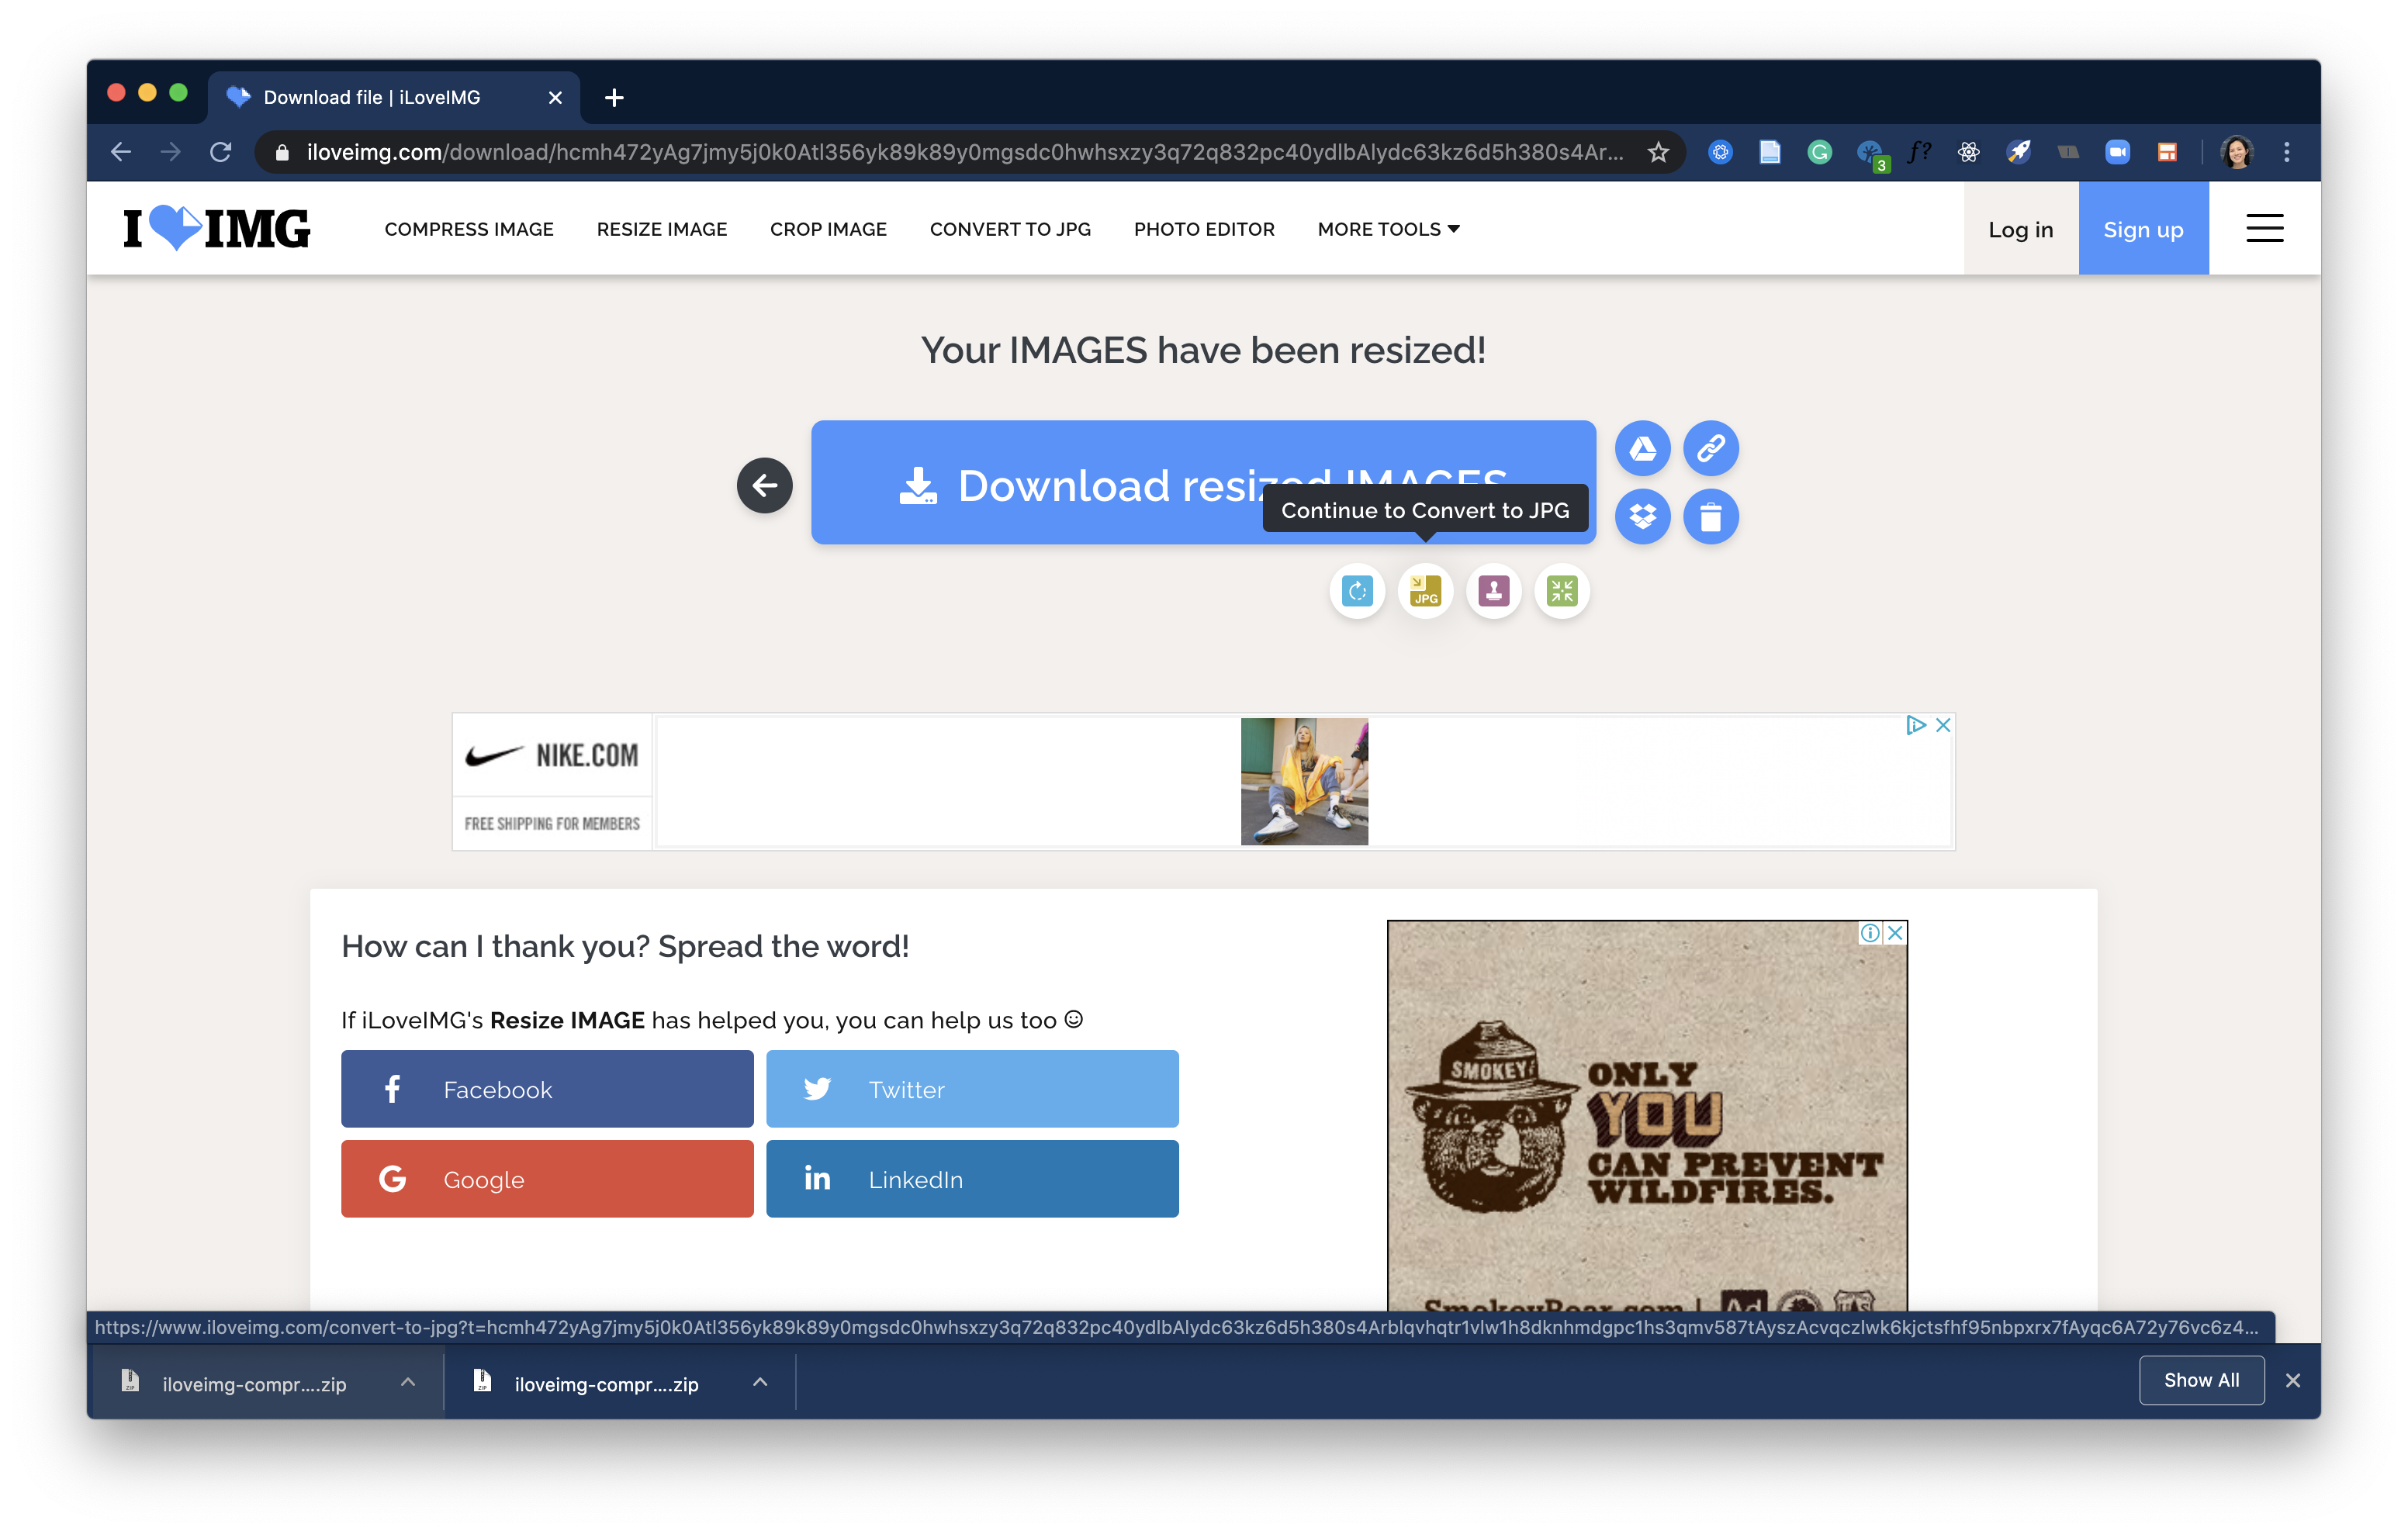
- Select Convert to JPG ->
- If a popup opens to download the image, select Cancel.
# Step 3. Compress the image(s)
- Select the green square icon in the menu to Continue to Compress Image
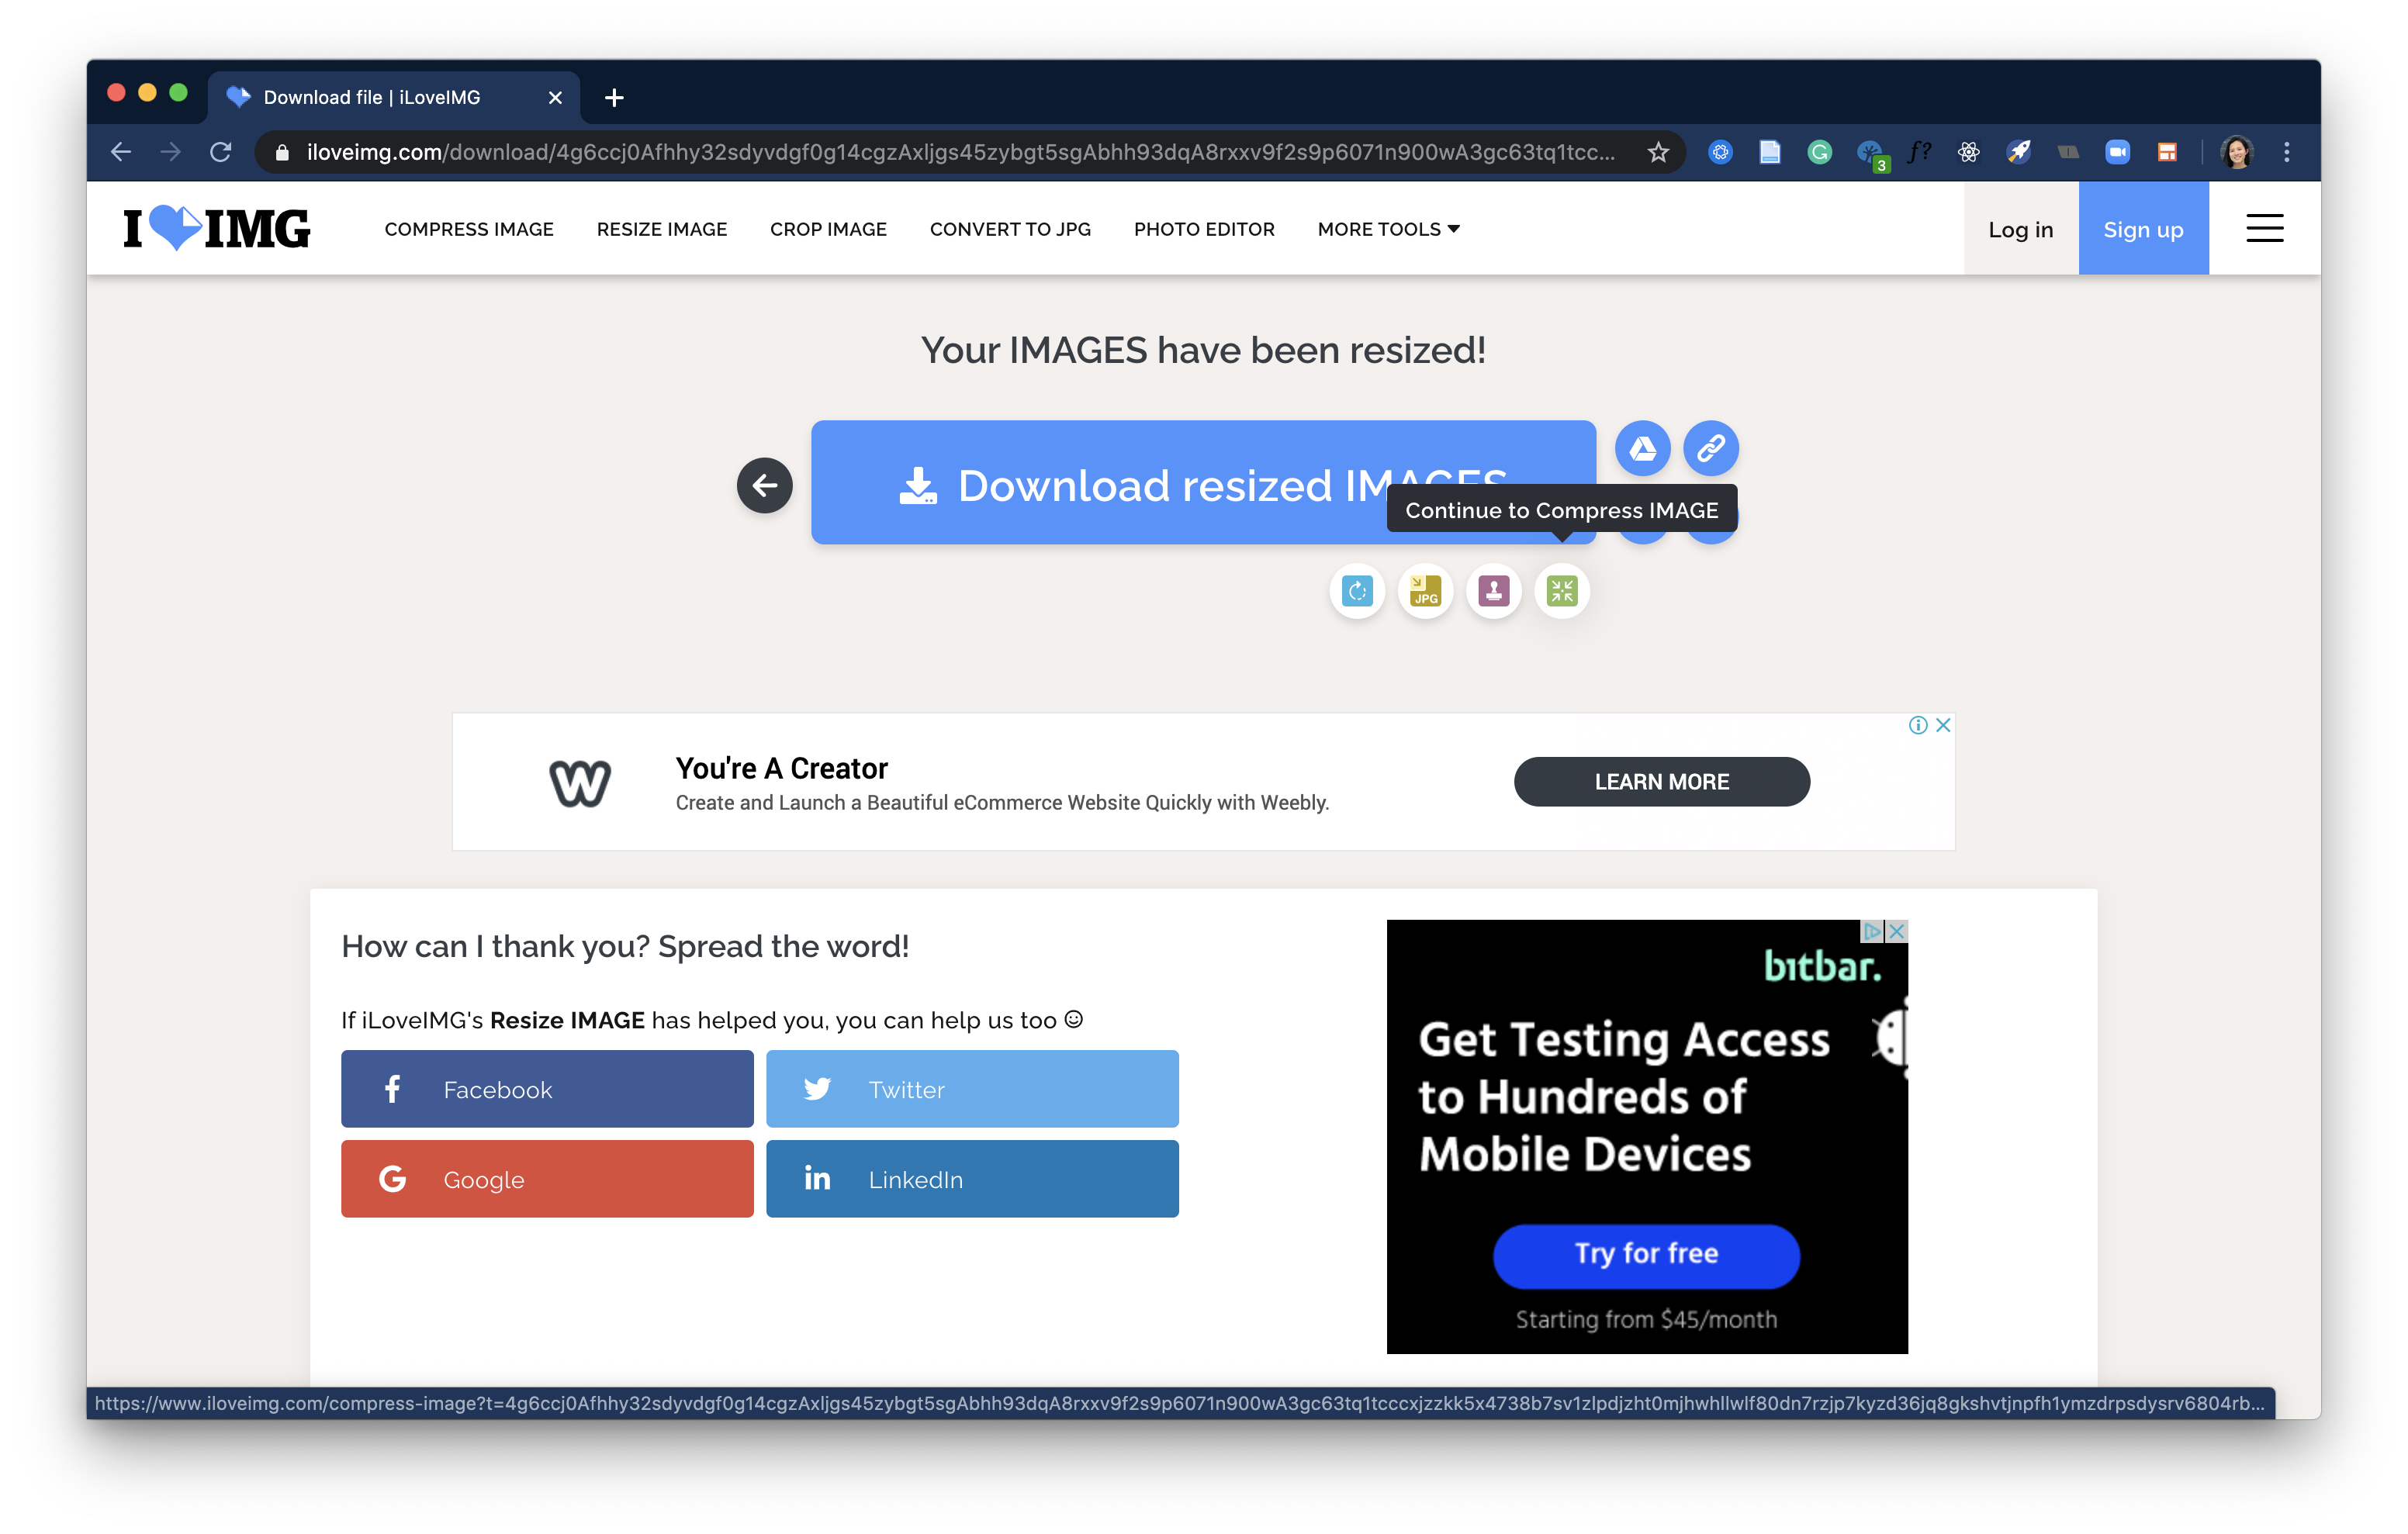
- Select Compress Images ->
- Click Download compressed images. This should download either a single image file or a .zip file of the processed images.
# Step 4. Upload processed image(s) to Airtable
If you are uploading the image to an existing record in Airtable:
- Drag and drop the processed image into the Image column in the Products table
- OR in the Image column, click the + button to open the file picker to select the file from where you saved it.
If you are uploading the image to create a new product through the Airtable form:
- Drag and drop the processed image over where it says Drop files here
- OR select Attach file